This is a photo tutorial on how to use a button with a shank (see below) if you don't want it wobbling on the surface of your textile.
 |
| An old shank button, upside down. |
 |
| Shank lifts the button up about 1/4 inch above fabric. This is fine if the fabric with the button hole side is a thick material, then the button will not stand proud when worn in a coat or blouse etc. For embroidery, a button standing proud can be annoying, especially if more embroidery happens after it has been attached. Lots of snagging and interfering with an embroidery hoop. |
 |
| Poke a hole with small scissors, going about half way up the scissors |
 |
| The shank of the button might be larger than the first hole. Carefully snip a few more threads along the straight of grain of the fabric, not on the bias. A bias cut will enlarge the hole more than you expect. |
 |
| The shank should poke through without the back of the button being seen. At this stage, you can whip stitch around the hole, or use the button hole stitch. I recommend this if the hole is either in a fabric that frays easily or if the button will be under stress. i.e. holding something in place. I haven't done the stitching around the hole because this is a good weave of cotton and the button will not be under stress. |
 |
| Cut a small circle, larger than your hole by about 50%. This is quilt grade batting and will hold together well. You can use most battings, a piece of tightly woven wool, or felt. |
 |
| Place the small circle over the shank. You shouldn't need to pin anything into place, this is an easy procedure. |
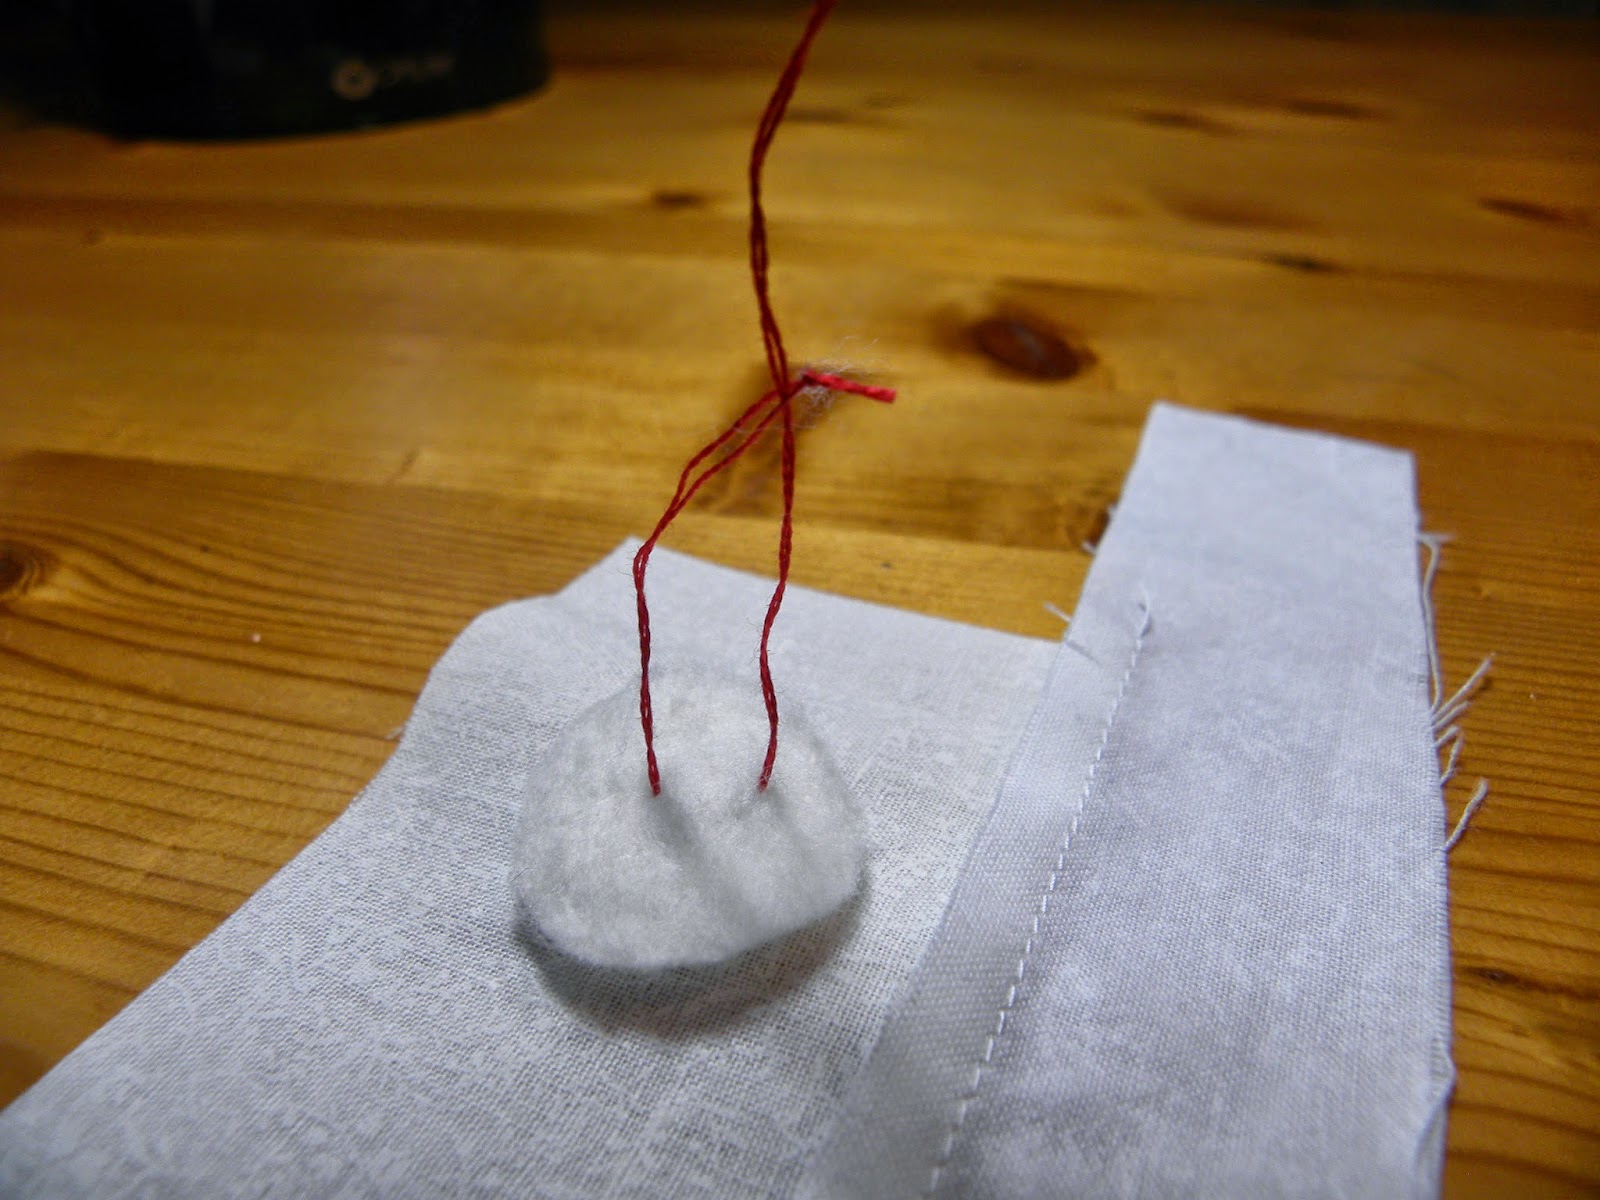 |
| This is the only tricky bit. Your thread requires a knot. The knot might slip through your batting. If you knot the thread, stitch once through the batting, catching the shank of the button and then slip your needle behind your knot, you will create a sort of slip stitch. |
 |
| Snub your first stitch tightly but not so tightly that your button pulls through your hole or the batting scrunches up. |
 |
| Stitch through the batting and shank a few times and tie off with a knot. |
 |
| Your button now rests on top of your fabric, the shank is buried below the surface. Of course, there is still the original height of the shank but the button isn't wobbling and is easier to manage if further embellishment is needed. It is possible to make your batting circle larger than the button and embellish through the fabric and batting. This will give you a bit of a raised area compared to other areas of embellishment. |
 |
| You can just barely see the three layers, batting on the back, fabric and the button. |
 |
| And the finished button. |
No comments:
Post a Comment