
First create a Pseudo Warp. Begin with measuring the distance between your back beam and the space between your reed and breast beam.
Using a coloured cotton, cut a length double this distance. (I didn't cut mine long enough and it became annoying)
You need a rod or a wooden lath that is attached (eventually) to your existing back beam. It needs to be several inches wider than the proposed project or slightly less wide than your back beam's rod and not flexible.

Using a half hitch, each length of coloured cotton is secured to this wooden lath. You now have two pseudo warp threads (because the thread was doubled). This threw me off. I had cut 80 threads because my project had 80 ends. Nope. Cut 40 threads. Doubled and these will make the 80 needed.

Once all the threads are half-hitched to the wooden lath, secure them into place with tape so they won't slip. I forgot to do this (mistake #3) but it worked anyways. Attach the wooden lath to your loom's back beam rod at either side. In the middle too, if you wish.
Thread the coloured threads through the heddles in the desired pattern. I used a plain weave. Keep it simple when learning something new, I think.

Tie your threads up in groups as you normally would. I tie mine up every inch worth.
Some of you will thread your heddles with the reed in, some of you with the reed out. In either case, it is time to make sure the correct reed is in place and sley the reed. 
Again, tie your threads up in your preferred way. When everything is nicely sleyed, take the time to undo all those threads and give them a trim across. Why? When it comes time to get the upcoming knots through the reed, you will want them in a nice straight line rather than higgeldy-piggeldy. Keep watching.

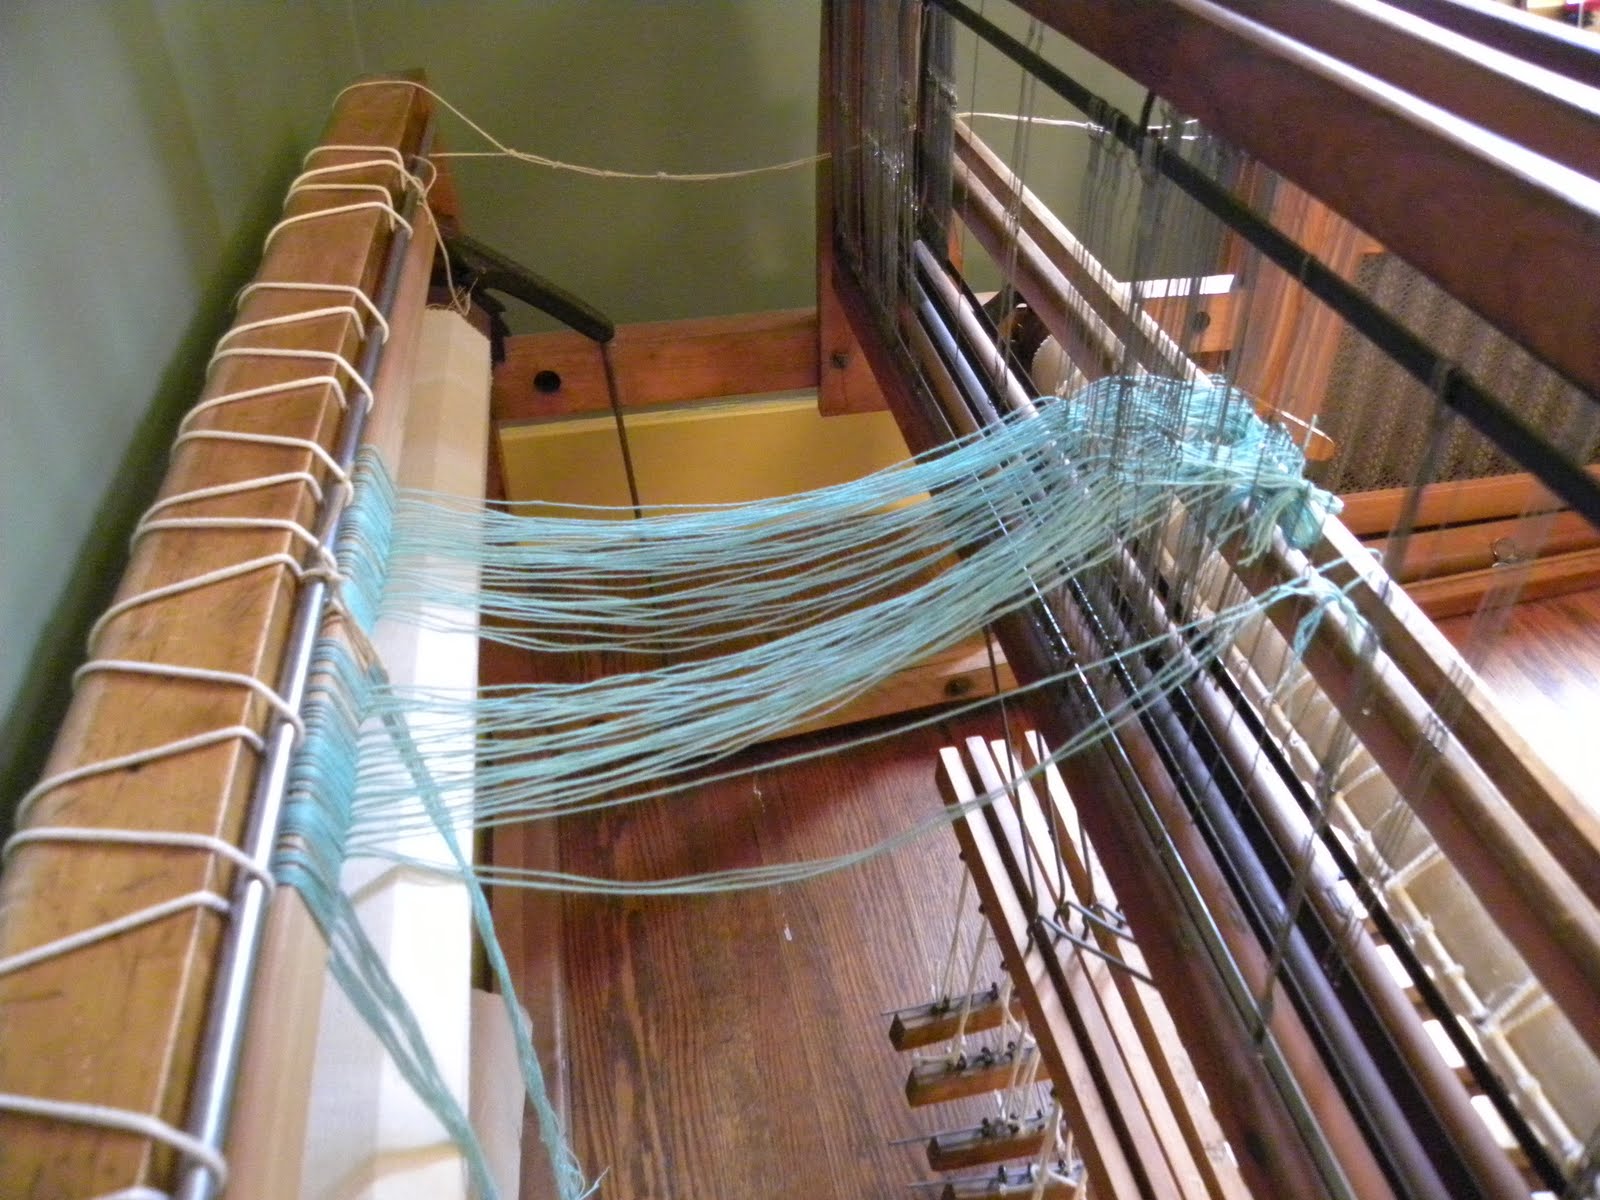
The real warp now makes it's appearance. On either side of your loom, put in place a securing string for your lease sticks. Slip the lease sticks through the first securing strings, then through the warp at the usual cross. On to the second set of securing lease stick strings and tie the lease sticks so they don't fall out. As mine did.
The cross is secured by the lease sticks. It is safe to undo the strings holding the cross in place. I didn't believe it could be true, but ultimately, it turned out to be the moment to trust the instructions.

Taking a group (about an inch worth) of real warp threads in your left hand, tie each warp thread to the appropriate false warp thread. First warp thread on the first false warp thread. Work in small groups because all those threads can be a bit of a muddle until you get a rhythm going.

I held the ends of thread (warp and false warp) evenly together. Then I tied an overhand knot. I don't know how to explain it. Maybe someone else who was there can step into the breach? 80 knots later, I was done.
Now tighten things up a bit so that the knots are just in front of the reed. See how mine are a bit (a lot) crooked. It makes the next step nerve wracking. Take the warp in your left hand, pull some tension onto it. With your right hand, snap the reed over the knots. With any luck (and I had some for a change) all the knots will be on the far side of the reed now. That is, between the reed and the heddles.
Wind the pseudo warp onto the back beam. Don't worry about paper on it yet, that's in a minute or so. Wind until the knots are just before the heddles. Make sure nothing is snarled yet. If it is a sticky warp, as in mohair, then for sure, do this. 
Crank the back beam a little at a time until all knots are safely through all heddles. If anything un-ties, give it a tie back up, but if the warp made it through the reed, this is unlikely.
Pause. It is time for the cool working with a sticky warp trick that Janet showed us. 
First, weigh down your lams so that shed 1 & 3 are up, 2 & 4 are down. Wedge something into the lams to hold this. Janet used her boot. I used a stool.

Taking the warp in small groups in your left hand. The shed for plain weave is now open at the heddles, you can see a space where your shuttle will go, but it's a bit of a mess, right?
Using your right hand, sweep through the shed from in front of the reed aaaaaallllllll the way to the end of the warp.
Yup, undo that thing you do to keep your warp from splaying all over the floor and sweep down it, using your hand to separated the threads into up and down. Next group, same thing. From past experience, I recommend you don't wear shoes with buckles. Birkenstocks for example, are known to get tangled in warps on the floors. I now do all my loom preparation in socks.
Once all the warp threads are nicely separated into up and down, then you can start to crank that back beam. Slip in your paper or laths as usual. Tug on the paper to add tension as you go. The warp traveling through the reed and all those heddles, plus the occasional tug on the paper will create tension enough, says Janet. There were about 15 witnesses to the fact that this is, indeed, all that was done to create tension.


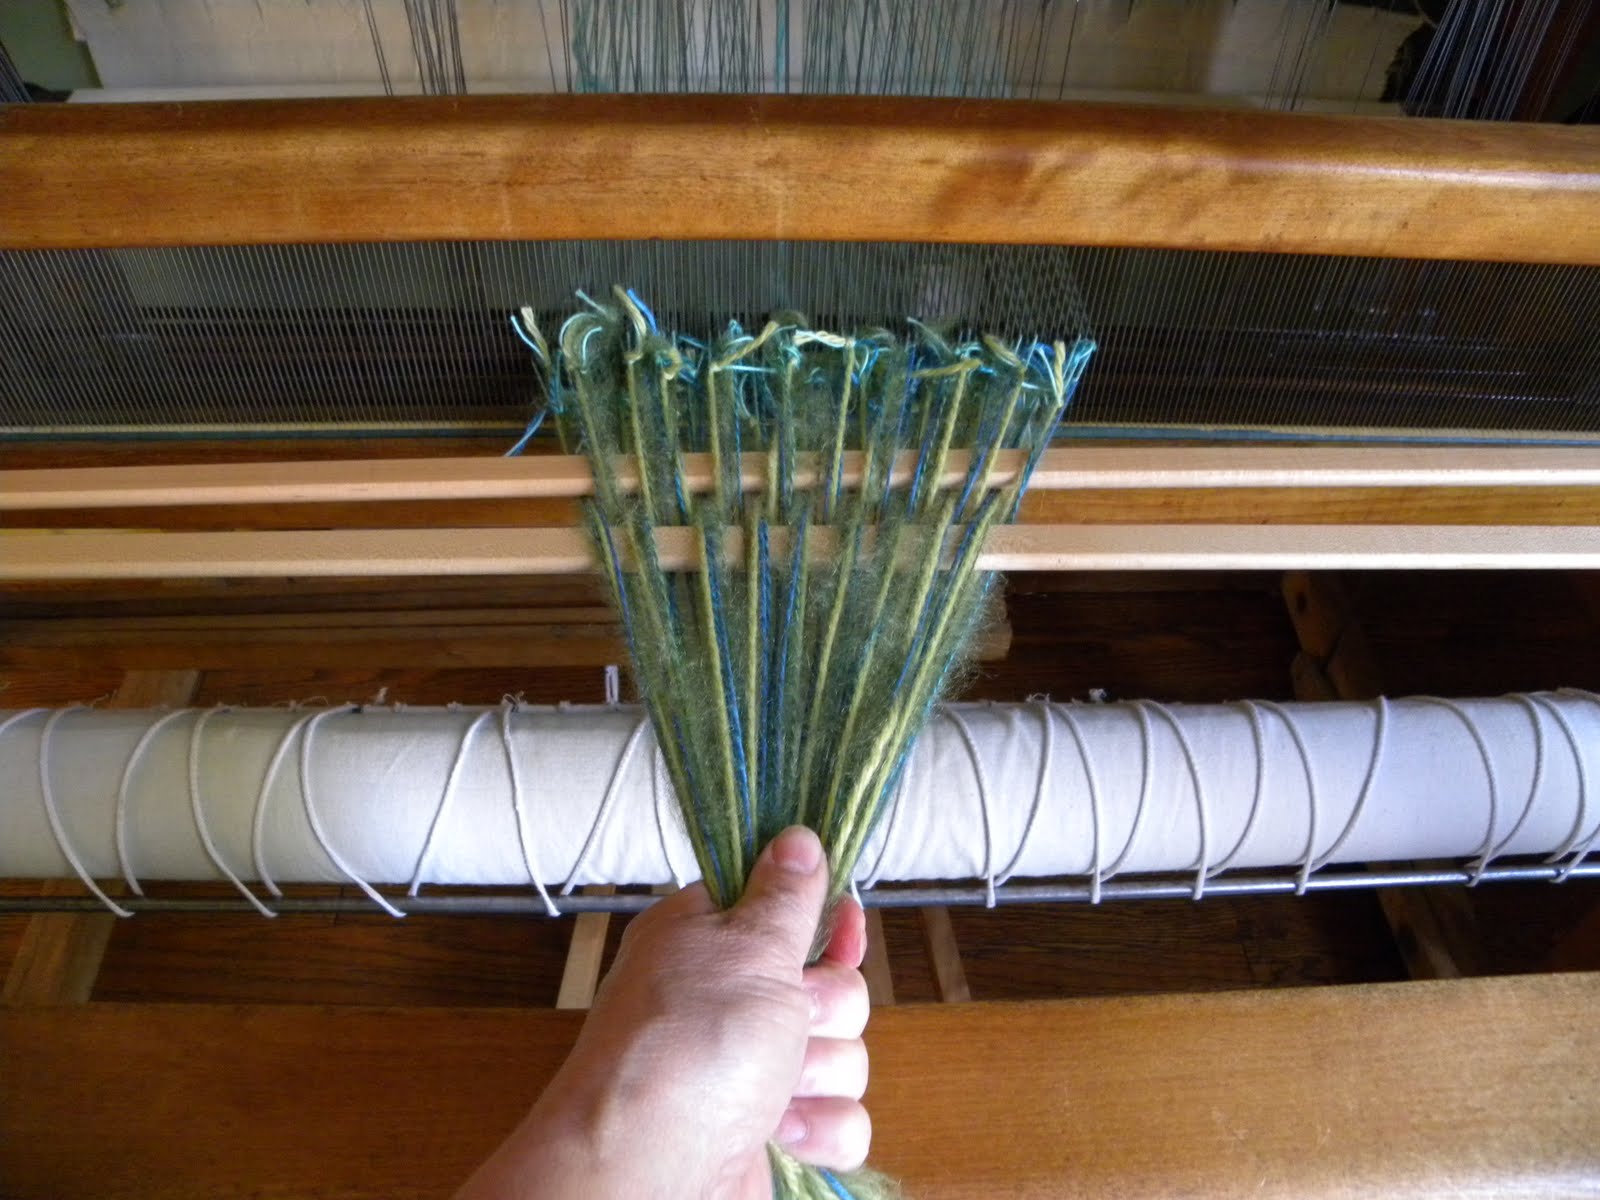
Once the warp is up and over the breast beam, your normal spot to begin tying on to the breast beam, take the time to give the ends of the warp a little haircut.
And now, the big reveal. WHY would you change your habits?
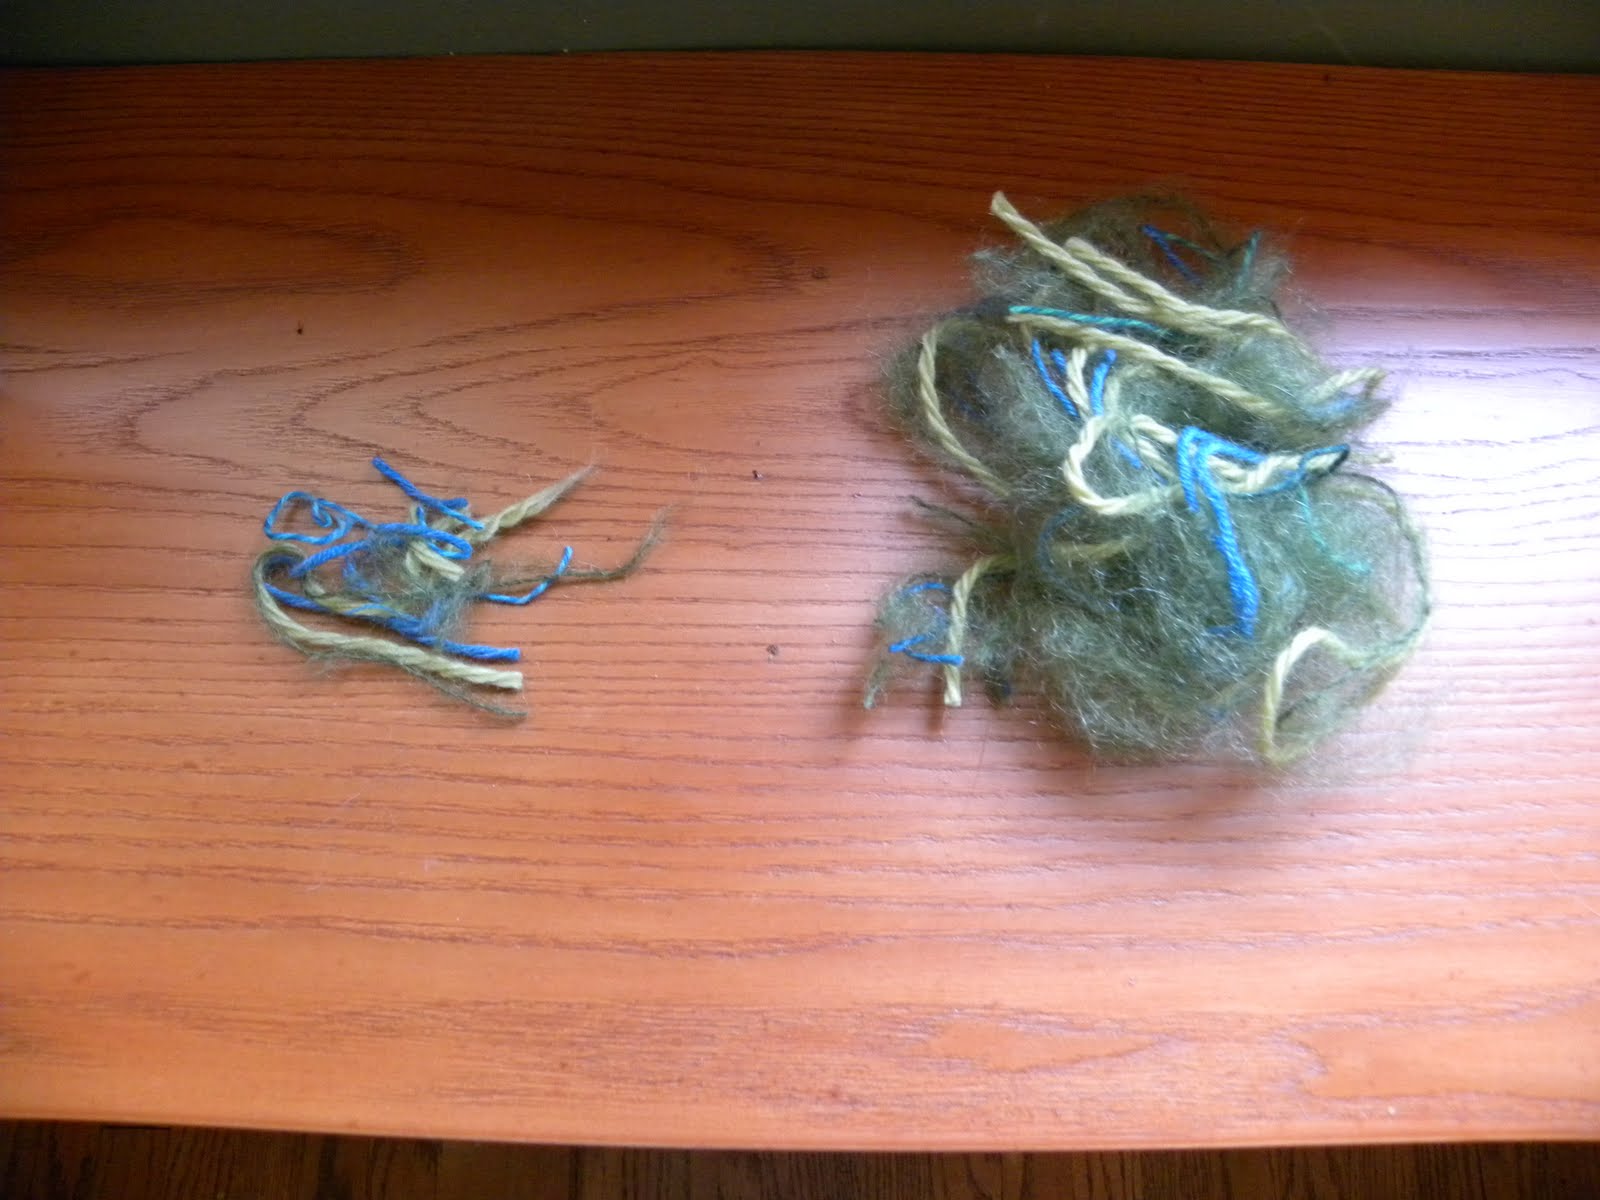
On the left, the waste from tying the knots at the beginning of the process. On the left, the waste from trimming the warp before tie up. THIS is why you want to experiment with a psuedo warp. Just look at the savings! Think how many metres of threads get lost in that distance between the back beam and the heddles in those final few inches of weaving. Gone. This is the entire amount of waste you will have. Who says this is only useful for expensive threads? My cheap Dutch blood was thrilled to bits. I bet those of you with Scottish ancestry will go nuts with glee.
Tie up, weave. Gloat in the savings.
No comments:
Post a Comment