Showing posts with label local clothes. Show all posts

Wednesday, November 11, 2015

A little thing called seam allowance

I've been on a kick to try and sew as many items for the family as I can. The idea is to support local fabric shops, independent pattern makers and slow down the consumption of clothing. We are perhaps part of that small group of people that hate shopping and wear things out until there is little life left in them. But I am vain and like things to look fresh and Steve works and needs a professional/professorial wardrobe. This is good, because neither of us has to try too hard to look nice.
I started with making pjs for everyone years ago, but the kids don't like them now. I've made aprons, shirts for Steve and Lucas, a few things for myself, and I knit socks. I've been using as many independent designers as I can. I guess it's time to make a heading for those in the gadget to the left.
Simple Modern Sewing, 8 basic patterns to create 25 Favorite Garments by Shufu To Seikatsu Sha has a nice design style. I traced out 3 patterns from her book, making sure to trace the largest size possible. I measured, I measured and retraced to make sure all the lines were square and straight. I cut the fabric. I was positive that seam allowances were included. You can see where this is headed.The fabric came from a friend who's hubby like to buy her fabric when he is in Thailand. I have been waiting years for the right pattern to come along.
Some garments have no hanger appeal. A wooden button has been attached above the left hip instead of ties.

I have made a lovely wrap around top for someone else. Not me. Nope, my upper diameter is just too large and no, the seam allowances weren't included. Luckily, this fits Phoebe and I will mail it to her shortly. I have since traced this pattern again, added diameter, opened up the armhole and redrawn the sleeve entirely. I don't know how anyone could fit an arm into this shirt. It was much to much tiny. In the end, I ran out of fabric and had to adjust to short sleeves. Truly, this was a disappointment and I hesitate to invest more time in the other two patterns I traced. Likely, these would work for the smaller breasted woman, as in none.
Alex is holding the button spot closed. The wrap shirt is meant to be worn over a long shirt tee, or undershirt.
My good friend Alex is today's model.
The back is supper cute. I pleated it instead of gathering it, making a more flattering presentation of one's behind.
I am so sad this didn't work out, I was really looking forward to wearing this style of top and the fabric. I even have purple socks that match. Well, I was not to be daunted. I have since cut out another shirt for Steve and pj's for myself. Then the sewing machine's zigzag stitch died. Sigh. Tomorrow we are heading out to drop the machine at the repair shop, borrow a friend's machine to tide me over and look at snow blowers. The only thing sewing machines and snow blowers have in common are the maintenance demands, the long extension cords and their noisiness when running.

Tuesday, September 15, 2015

This blog's photos walked away

I started sewing on this shirt at the beginning of the summer, but it took me several attempts to find the right buttons. The fabric is a green challis, almost exactly the same colour as a shirt Steve already owns. Ooops.

Steve likes them loose and long. 
He likes a bit of a pleat or gather along the shoulders and a slight curve along the back hem. Good thing the Negreni/Walden pattern (colette patterns here) has all that. I had a better time understanding all the finishing details this time round (3rd) and have finally figured out the button hole foot.

Steve redrafted the collar details so that the collar doesn't lie too openly and look like a deflated balloon. However, I'm not keen on how the collar joins into the shirt front. Neither am I keen on the button hole placements. I didn't make any adjustments, I followed the markings and they just look wrong to me. 
There is also a bit of disappointment at the sleeves. The long sleeve version requires a lot of adjustments and the short sleeve version is a touch too long as well. What I am learning from all this is that a body form (a.k.a. a dummy) would be a good thing to have around the studio, to get better laying of lines and placement of details. Something to think about for a Christmas present.
My lovely model is getting impatient to leave for work. He has a job to do. See ya later, fella.

Tuesday, May 19, 2015

feeling refreshed

The house is back in order, the garden cleaned up and my studio work progressing nicely. I think.
The last corner of my table cloth project is finished. My good friend Linda, who can cut with scissors like a wizard, helped me with the blue flowers and dots. Linda cut them out and ironed them on and stitched a bit before handing it back to me. I am so grateful, because really and truly, I can't cut well at all and I wanted this flower to look crisp.
For those who are seeing this for the first time, the piece began life in one of Karen Ruane's online courses. Others were using hankies, I had two old pillow cases I wanted to make use of.


I am very happy with the out come. Only trouble is the darned thing is so old and fragile that where on earth can I put it? I might have to add a large bow and wear it as a cape along with my tiara on my birthday week.

This little piece was begun before I went to England. I meant to bring it with me when I attended Karen's real time, in person class in London, but I had it mostly finished before the date arrived.
 Since being home I have added the lace and ruffle on the bottom edge and a few minor details. I'll back it during the summer when I need easy tasks to have with me when we go to the camp.
This piece began sort of by accident. I had cross stitched the blue bird on a scrap with no real intention, and a year ago embroidered the gold flowers as an idle pass time.
 I often have plops of fabric lying about on the floor and scuffing through them leads to colour or texture combinations that I become inspired by. The gold and blue bits fell onto some white-ish linen and the piece evolved. This is my shake and back method. Start with something, throw it on the floor and see what happens over a few days. No shoes allowed in the studio.

The shake and bake method can be pretty hair raising when I get the paints, pastels and glue out. I am taking a 5 week course with Karine Swenson via Carla Sonheim's blog. (here) The first week's assignments are about lines. First messing about on paper with any drawing tool, then messing about on decent paper with paints. These are 6" x 8" on a very hard paper, and have some qualities I like.
pastels, watercolour from a tube squished on and smeared with a flat edge


charcoal, conte and wet brush through the charcoal

This is a close up of an 8" x 11" on watercolour paper. I like the intersections where I've added the gold marker.

I'm still sewing summer clothes for Steve and myself in an effort to have local, ethical clothin (I know, it ain't that simple). I am happy with this sleeveless tank top. It is meant to go with an orange and white skirt that is a bit louder than I expected. If I made a gold or orange top, I would feel just a little bit over 2000 volts of "See Me".
I've looked all over but can't find any photos of the skirt. I'll have to model it with the top sometime.

This top was a nightmare to sew. It is really very simple but the chiffony fabric is a horror.
the front hem is straight across while the back hem scoops down. There aren't any detail shots because there aren't any that help to redeem the drabness of the garment while on a hanger.
 After finding a fine enough thread, fine needles, using lots of pins, cutting carefully, getting lots of online advice, the fabric still crimped and pulled. There are 7 seams, including two armholes, the collar facing and all the hems and not a bloody one of them didn't need to picked out, redone, or just left to look awful. Worst of all, it has absolutely no hanger appeal. It's just a drab looking piece of fabric. But it looks good on because it drapes beautifully. I haven't figured out how to take a decent self photograph with this camera so I'll have to wait to show you.

In the works are a green shirt for Steve, a shirt dress and slip for me, several tops for me and a bedskirt. I hope those experiences are a little less horrible. So yup, I've been busy.

Tuesday, March 17, 2015

I'm on the make

There has been a sewing frenzy going on around here. Snowed in, still! Yes the rest of North America and places beyond, we are due for another 30 cm tonight and into tomorrow. Sniff a daffodil for me. I digress. It is good weather for sewing in. I've saved up little shopping errands for elastic or buttons and when I have about five things I need, I have headed to Fabricville or Patch
(http://patchhalifax.com/).


This is the back of Steve's shirt "Walden, a Collette Pattern" (http://www.coletterie.com/) that I showed earlier. The fabric is a royal blue and white twill, lots of itty bitty raveling at the seams. I really botched up the button holes. Steve is only allowed to wear the back of the shirt, he'll have to put a paper bag over the front. I also messed up the cuff plaquard thingy, it is on the front of one of the sleeves instead of behind. He isn't allowed to use that arm all day when he's wearing the shirt.

Same shirt as above in a white background with browny/black lines.

I paid super attention to the cuff thingys and they are in the right places. I also read the instructions for a curved felled seam several times and tried it out on scrap fabric. I checked twice to make sure the correct sleeve was going into the correct shoulder. All's good until Steve tries on the shirt and we realize I have sewed the right sleeve on inside out. Luckily, this was correctable without ruining anything, except my nerves.

I changed up some of the small details and added a white/black stripe.

The button holes still need to go in, but I am saving that for a day when my nerves are steeled. Or stealed. Or stolen.


For a break between shirt details, I pulled out a 1940's apron pattern. A friend bought it from Calico Cat Quilting Books and Patterns
http://www.quiltingbookspatternsandnotions.com/publishers.php?category=Calico%20Cat
I wanted an apron that comes up high in the front, because the more I age, the more food goes down the front of my shirt. This should block all that spillage nicely.
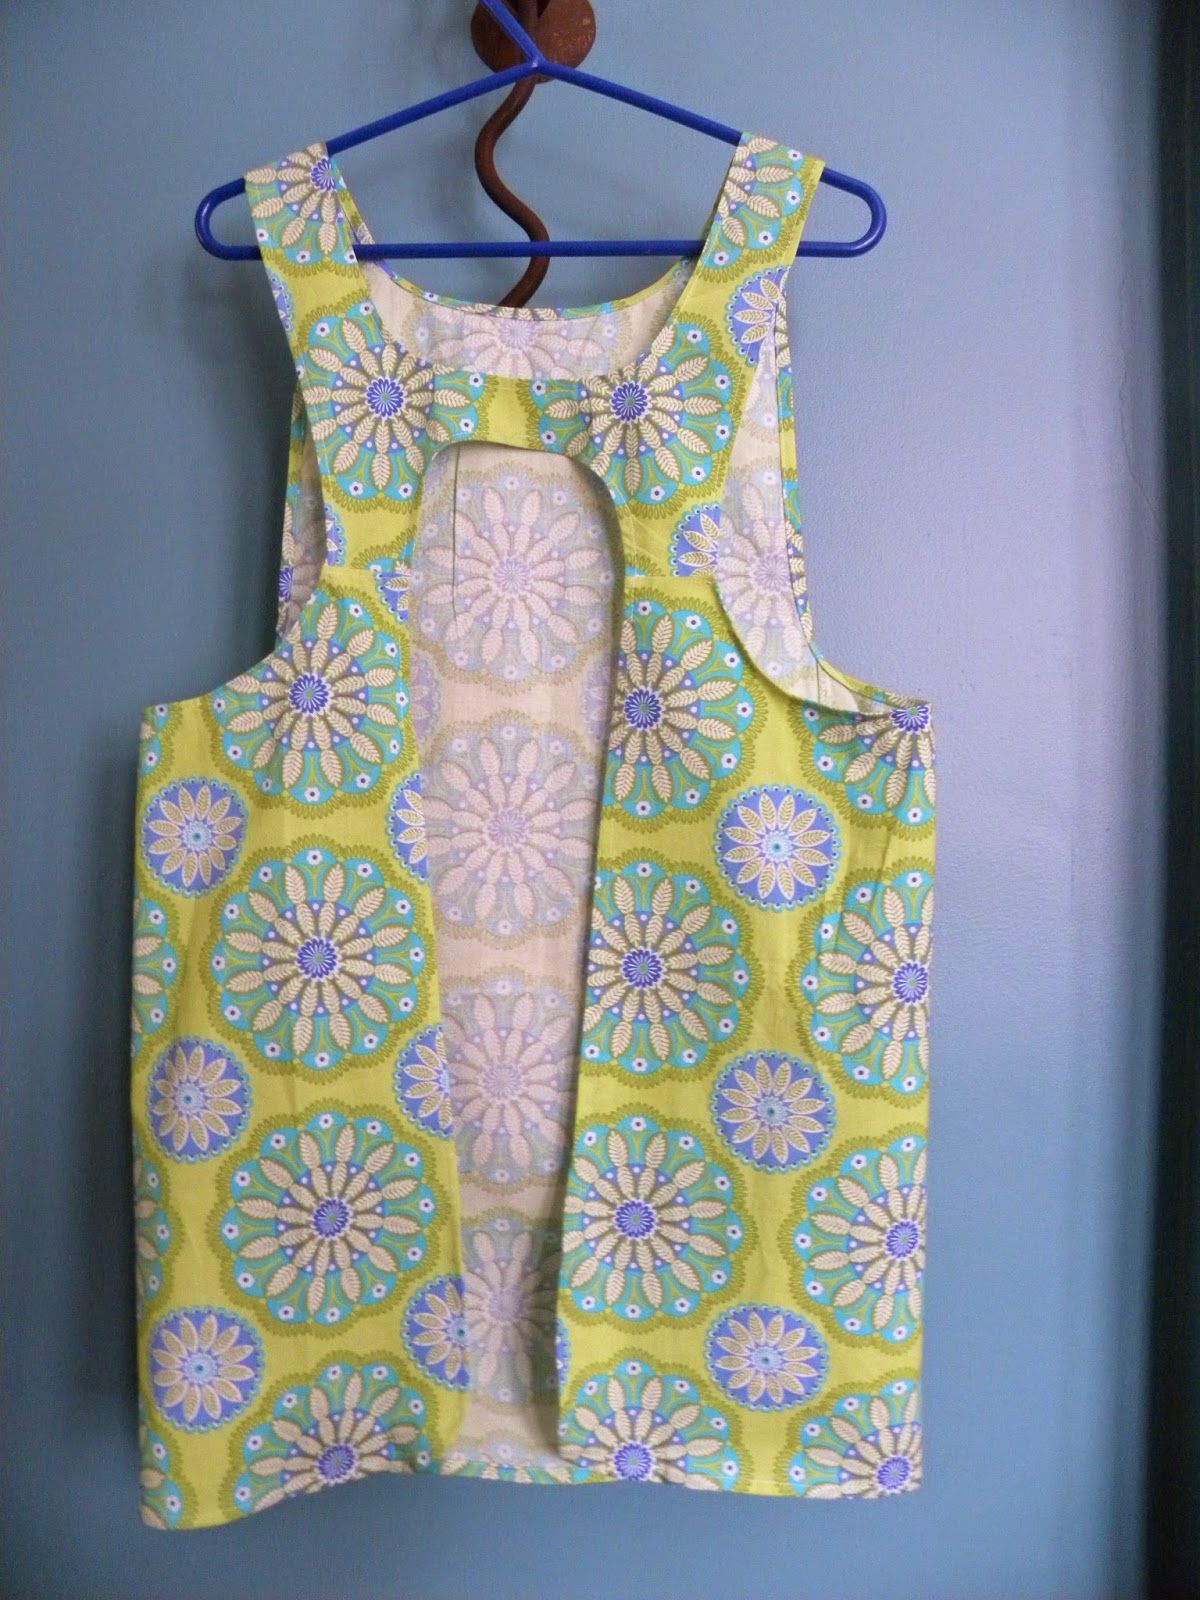

The back strap keeps the shoulders from slipping and the wrap around section doesn't flap about. I like it quite a lot. I do not love this pattern's instructions or tissue pattern. There aren't any images to help you make sure the correct piece is being sewn to the correct piece. Maybe I am terrible at reading patterns, but the tissue parts made it look like the small curved piece on the back joined the front shoulders. They don't. Rip and repeat. I am glad the apron fits so well, because I never did figure out how they wanted to tie to work. There is only one tie to cut out, but two ties to tie with and where do they go?. I hope to do this pattern again, but I will redraft the tissues and write the instructions out for myself with photos and file them away to make some more for when I get even older and the nurses refuse to dress me in anything other than aprons and bibs.


In the fall I made a brown jumper (for the Brits, that means a sleeveless dress worn over shirts or sweaters) and it is pretty itchy. I scratched my way into deciding I needed a slip. Last button trip to Fabricville, I purchased a half metre of this silk rayon and a shiny biased tape. No pattern, just one seam, one hem and one elastic band and it is all done.


This magazine page has been in my knitting stash for ages and ages. I finally had the right yarns and pulled it out. Naturally, the instructions were missing. (Lily Chin designer, Knitters Magazine 2000)


I decided to just wing it and see what would happen. Lily Chin has either a double seed stitch or a basket weave pattern going on in the dark black. I used stocking stitch because I get a looser tension that way.


It is meant to be worn with an undershirt of some kind so the wide open neck doesn't bother me. I edged the sleeves with the black merino/alpaca blend but left the collar and hips alone.


I did have to knit the dark black section twice. The pattern relies on a loose gauge and once I switched to straight needles for the armholes, everything tightened up. Since it knit up quickly, I decided to rip out the black bit and do it again on larger circular needles and then a half size up on straight needles. I knit the sleeves first to make sure there was enough yarn for those, then used what was left for the bottom section. I'm rather pleased with myself on this one.

A few years ago, I made nearly everyone a "Ditty Bag" (I have lost the pattern info and have only the instructions left) and had almost enough leftovers to make one last one. I didn't have quite enough to make it wide enough but over the past few years, I picked up a pink or two.


The people I have given these to have used it to hold knitting projects. It's good for shoes in a suitcase or other things to lug around that needs a bit of pretty. Does anyone want it? Let me know and it can be yours.


And not quite finally, I have assembled two pieces to take to Karen Ruane's day class "London Gathering" in (luckily) London, England.


I'm not sure which one I will take, they both interest me for different reasons. The first one is more of a sampler of stitches (one I stitch it) while the second one is more about figuring out how to stitch with thin fabrics. Karen is a wizard and I think can help me figure out issues with the bottom one while the upper one is less pressure for me. I'll just stitch and stitch until it is time to pack the suitcase, toss them both over my shoulder like a bride with her bouquet and the one landing closest to the suitecase goes with me.

The sewing goes on. This week I have a skirt cut out and half sewn, a shirt dress waiting to be cut and a full slip next in line. Since the flurry is inspired by Cheryl's sewing and her challenge, I will have to get her to send some images to post here. There's an idea. She is going mad getting ready for two fundraisers and shoveling snow. I am sure she has enough time to write a guest post. I'll go bug her now.

Monday, October 27, 2014

Three little blurbs from here

The next few images of Turkey are a bit murky. Murky Turkey. We are below ground in a huge cistern system built during the Eastern Roman Empire. This society was happy with water from a cistern, however, the Ottomans preferred their water to come from running sources. If you go through gardens of each era, you will notice that some water features are still and others are not. This is the reason.


This cistern was built on the original site of the Hagia Sofia. The columns were re-puposed from the Sofia as were other building materials, column capitals and two columns that had Medusa's head carved into them. 


The whole space is hugely tall and that is because it would have been filled with water, bottom to top. We would have never been able to walk through the space when it was operating.

Back home in the land of now, the studio is completely cleaned up. I can rush from here to there, there being where the tea or scotch is kept, depending on the reason for rushing.


This is my closet, the door finally able to be closed, the sheet hiding things taken off and the floor as clear as it ever gets. I organized the piles into 'freshly started', 'almost done-get on with it', and 'about to start if I finish up the second pile'.


I have finished my pin cushion for Karen's class. I turned it into a small wall hanging, with pockets. There is a slit pocked behind the polka dots that will house all the slips of paper with passwords and secret decoder rings.
 

When the owner of my favourite button collection returns to better health, I will trot over with cookies and we will rummage through her gad-zillion buttons looking for a couple of cuties to put among the daisys.


These back pocket will hold the ear phones for the computer (nasty, curly things) and several business cards I am trying not to throw out, I want them for Christmas shopping. A couple of nice pins and up she'll go, hiding several annoying things off my work space.

Last week's post about insulation mentioned some sewing I had done. This jumper is a very chocolate-y brown with black undertones flecked through. The princess seam is flattering to us big chested girls but it looks like hell on a hanger. This jumper will be delightful in cold months with a turtle neck and woolen stockings.


 I made the same pattern up with a skirt that used to belong to my sister. Again the hanger appeal is low, but it looks good on. This comes just below the waist band and will make a nice tunic top for cold days. If you can believe it, both fabrics come out of my stash from around 1982. I remember buying the brown wool as a graduation present to myself and my sister abandoning the pleated skirt at that time.
Again the light isn't doing this justice, it is a deep pink/purple. I need to brag, see how I lined up the plaid almost exactly across the horizontal line? It was pretty tricky to do considering I had a limited size of yardage to fool around with.

The camera is not loving the light today. This sweater started in August is done. I wanted a lose fitting vest knit on circular needles. I made it up as I went along. Of course that meant having to do the neck area twice to get it right. I figured out how to make a slit pocket on the front, with a little cuff of seed stitch.

I had a lovely single ply green ball of wool from someone else's stash and using much smaller needles made the inside of the pocket. A place for my keys if I dash out to the corner shop.


Rather handsome I think.

The giant hanky project is coming along, hopefully done by next week. In the meantime, the wind has not slowed down for almost a week now and it has found all the ways into the house. Therefore, it is time, not to find the leaky bits, but to make a fire and snuggle up with the book that is due for BookClub.